Kaze'aze was the initial primary antagonist behind the scenes, causing the five-year war between the Serdin and Kanavan Kingdom. Formerly a human named Karina Erudon, she was corrupted and manipulated to the dark side by Ashtaroth for unknown reasons.
History
Kaze'aze was originally Karina Erudon, a minor of the Kanavan Royal Guard at the age of 14. She was good friends with Princess Anyu (the would-be queen of Kanavan), and was later sent to Serdin for exchange education and befriended Princess Enna (the would-be queen of Serdin).
However, Karina's descent to darkness occurred on her return trip to Kanavan, where Ashtaroth ambushed her, the two princesses, and several other royal family guards, at the Gorge of Oath. Ashtaroth obliterated all the royal family guards while Karina was able to protect Enna and Anyu, but her body mutated into a demon due to the effects of Ashtaroth's spell. She was then framed as the participant of the Royal Family Genocide, and was banished from Kanavan for eternity.
Since then, she grew hatred toward humans. Baldinar (Ashtaroth) later appeared before her and taught her how to use her demonic powers and evil magic, and was thus reborn as Kaze'aze. Later, in Ellia Continent, she discovers Lass, a scion of the demon race, and sets her eye on him as her possible vessel.
Ronan Erudon becomes a member of the Kanavan Royal Guards at the age of 12. He became the personal guard of Princess Anyu, who was the number one candidate for the throne. When Princess Anyu ascended the throne to become the Queen of Kanavan, and soon promotes Ronan to the commander of the Royal Guards, Serdin's Princess Enna ascends to the throne of Serdin as well.
Kaze'aze infiltrates in to the Kanavan Palace, killing the Queen's most trusted advisor and disguising herself as him, then possesses Anyu. After discovering of Kaze'aze's existence, Ronan is possessed by her as well. Kaze'aze commands Queen Anyu to wage war against Kingdom of Serdin, with Ronan leading the Kanavan forces and laying siege to the opposing kingdom, and thus the 5 year war with Serdin began.
After the war ended due to Enna's sacrifice, Anyu was freed and, after realizing what happened, demanded Kaze'aze's execution. However, Kaze'aze escaped, leading Anyu to form the of Kanavan Trackers, made to protect the Kanavan Kingdom from further suffering by Kaze'aze. Unfortunately, none of the Trackers ever returned, so the new Queen of Serdin made a group called Grand Chase to find and defeat her, for the sake of all Bermesiah.
Storyline
Many creatures, such as the Harpy Queen, Orc Lord, Red Gorgos, Troll, Gaikoz, and Elena, were influenced by Kaze'aze and fought for her, creating havoc on the whole Bermesiahan continent.
Elesis was upset because her beloved father, Elscud, was one of the trackers, and joins the Chase to locate him, and possibly take revenge on Kaze'aze.
Her influence caused the Elven Corps (especially Lire) to go under hiding. After the war, they ended their isolation and helped humans, while uncovering Kaze'aze's intentions.
Arme of the Violet Mage Guild became curious of Kaze'aze's initial energy, and decided to research it.
Ryan is a witness of Kaze'aze's chaos towards nature. After seeing the destruction of Partusay's Sea and Elven Forest, he takes up his role.
During the five-year war, Kaze'aze's possession of the Kanavan Queen seeped into Ronan, causing him to mercilessly attack the opposing kingdom. He was eventually freed after the war. Sometime later, after he and the Grand Chase outs Gaikoz, one of Kaze'aze's commanders, he agrees to join them in stopping Kaze'aze.
Lastly, Lass is another victim of her possession.
Kaze'aze is mentioned many times in Silver Land and is believed to be the one who poured her darkness into the said continent. However, it is revealed an even greater agent is at work as the citizens mentioned the threat coming from the land of the gods, a place where Kaze'aze isn't at. She was also assumed to be the voice that told Victor that he outlived his usefulness and left him to die, but that also isn't true.
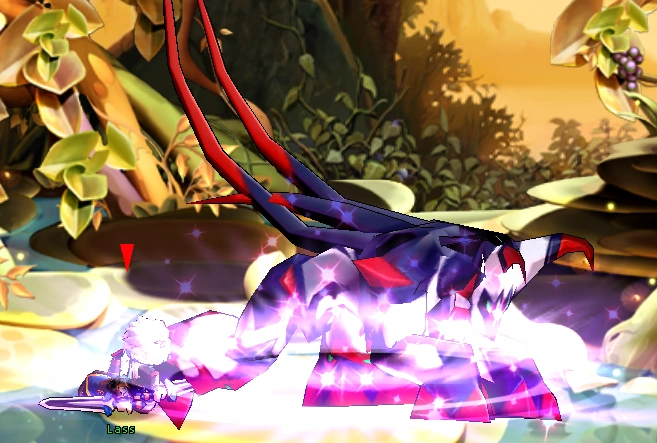
An illusion of Kaze'aze Lass somehow levels off a ship that was headed towards Ellia, with the Grand Chase on board. Fortunately, they survive thanks to Arme commanding spirits to aid them.
Kaze'aze Lass is officially met at Kamiki's Castle. Ryan and Ronan recognize the boy as Kaze'aze and informs the others that she had possessed that child. She leaves as her minions "play" with them. She later returns and resurrects a defeated Elena and then transforms her into Kamiki, and leaves again.
The Chase finally confront her at Kaze'aze's Castle. The then accuse her of starting this "war", but she claims that she did not start it; humanity's selfish desire, or as she calls it "strife", was the war's beginning. She then challenges them to "prove" the peace is a lie.
Kaze'aze then transforms after the "frail" body was too damaged, shocking the Grand Chase. Nonetheless, Kaze'aze is still defeated; Elesis demands her father, Elscud. The dark overlord is intrigued by the name and reveals that she sent him and the rest of the Kanavan Trackers into a dimensional rip and are likely screaming in the abyss; Lire assures that people who have been warped into such areas are likely to return, according to her elders. Before she dies, Kaze'aze warns them that she will return eventually.
Lass then awakens from his possession, but is horrified at what Kaze'aze forced him to do. He is then apologetic as he learns the mistakes he unintentionally caused, but wishes to start anew by joining the Grand Chase.
After a long, unspecified amount of time since Kaze'aze's defeat, Kaze'aze returns after a battle between the Twelve Disciples and Veigas; their fighting had created a dimensional rift that summoned a massive Dimensional Gate along with the Tower of Disappearance, both of which are slowly turning Aernas into Elyos. The Grand Chase investigate the tower and, much to their shock and horror, especially Lass's, discover Kaze'aze's return, who proceeds to taunt the Grand Chase and awaits them in the higher floors. Lass mentions that Kaze'aze took a human-like form due to magic and will.
Veigas later arrives in the tower and encounters Kaze'aze, who asks about her working with someone, but she refuses to reply to someone who will die soon. The Grand Chase appears shortly afterward, but Veigas, not wanting to get involved, leaves. Kaze'aze then proceeds to taunt the Grand Chase again and tries to possess Ronan again,, stirring up his memories and vaguely reveals that Kaze'aze was formerly a member of the Erudon family.
As Ronan struggles with his memories and possession, the Chase finally fight Kaze'aze at the top of the tower. Indeed, Kaze'aze proves to be much more powerful than her last encounter, and eventually moves in for the finish, but Ronan resists mind control and uses his body to shield his comrades. An amused Kaze'aze simply leaves.
In the aftermath, Kaze'aze speaks to an unknown person, who plans to finish the Grand Chase and tells her to bring them to him/her.
Attacks
Kaze'aze's Castle
1st Form
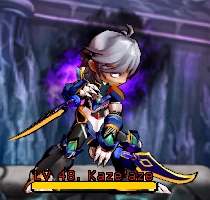

Kaze'aze Lass
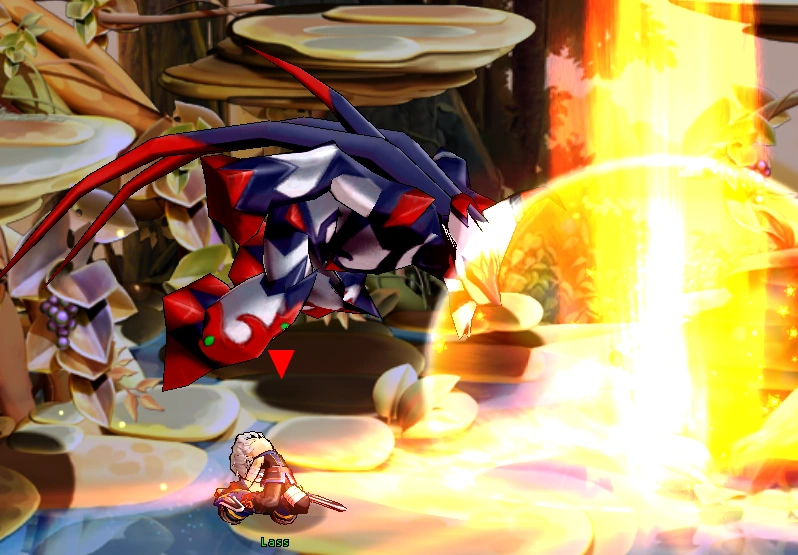
Upon first encounter, Kaze'aze resides in Lass' body and uses him to attack the Grand Chase.
Kaze'aze Lass possesses the Thief's Basic Combo, Double Jump, Kunai Toss, Dash Attack, Impact Slash and Final Strike Chaser. The match can be seen, in a way, as a PvP match; however, Final Strike Chaser cannot kill as it passes through the floors without heavy explosions, it does not have Fatal Tempest Fury nor Skill Tree, and neither players nor Kaze'aze Lass can grab one another. Kaze'aze Lass also has a gimmick that, whenever she takes too much damage, she will slide out of harm's way and is invulnerable and intangible throughout the slide.
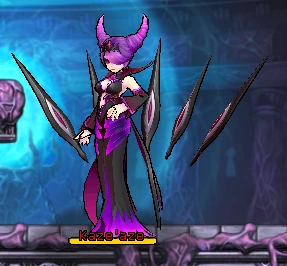
2nd Form
After defeating Lass, Kaze'aze discards the body and assumes her true form: a canine-like demon.
Jin Kaze'aze's attacks involve a low swipe, a claw slash that leaves off a dark orb that does constant damage over time and haste, running across the room and trampling, a roar which summons a dark vortex on top her enemies that sucks in them to deal damage (much alike Dio's grab), a full spin that shakes off her opponents, and a DANGER attack involving her pounding the ground three times.
Tower of Disappearance


Human Form

Kaze'aze in Tower of Disappearance
Kaze'aze in the Tower of Disappearance takes the form of a human-like character. Kaze'aze touches her surrounding eye-shards in a sequence, an indicator to her attacks. She also frequently teleports around the four corners in the room as well as the room's center, though she does not walk around.
Her attacks involve:
- Summoning five dark orbs in an arc and fires them, with their size increasing the farther they travel. Kaze'aze touches her fourth and fifth eye-shards when using this.
- Summons numerous pillars around her, indicated by runes on the floor, dealing multiple hits of damage. Kaze'aze touches her second eye-shard when using this.
- Summons six eye-shards and sends three flying to her left and right with indefinite range. Kaze'aze touches her first eye-shard to trigger this.
- Summons a barrier that reduces damage. After a few seconds, the barrier disappears while a poisonous cloud is spawned directly on top of players. Kaze'aze touches her first and second eye-shard to trigger this.
- Generates a pillar of darkness around her that drains player's HP. Afterward, she will throw two small flames to in an arc to her sides. Kaze'aze touches her fifth eye-shard to trigger this.
- Summons an orb around her that knocks back players a huge distance if impacted. Kaze'aze touches her second eye-shard to trigger this.
- Kaze'aze accumulates energy while runes appear on the ground either away or toward her. Afterwards, lightning strikes over the runes locations, dealing massive damage. This attack strikes everywhere, and thus it can only be avoided with Dodge System or invulnerability frames. Kaze'aze touches her central eye-shard to trigger this and teleports to the center of the room.
- During the battle is a gauge in the top center of the screen, which fills if players stay too far away from Kaze'aze. If it fills completely, Kaze'aze summons a dark orb that expands over the entire screen, instantly knocking everyone into FATAL and completely bypasses any form of invulnerability. The gauge empties once this is complete.
Assisted
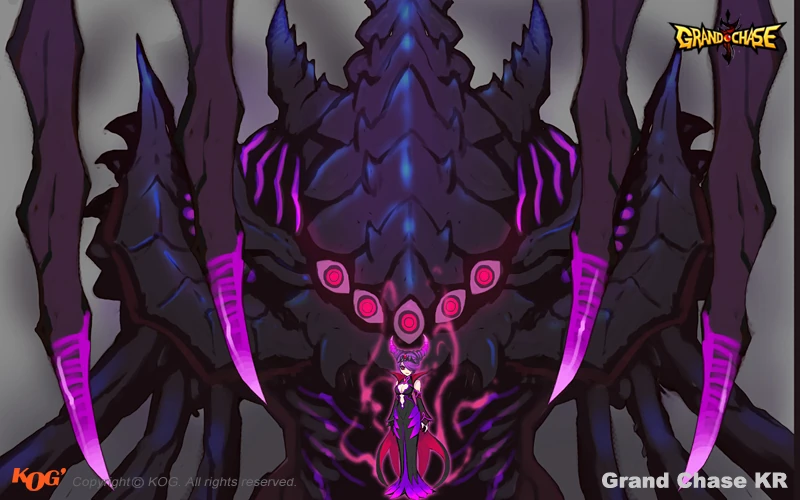

In the final room of Tower of Disappearance, Kaze'aze sends her eye-shards to the center of the screen and summons a gigantic demonic figure. In this fight, Kaze'aze retains all her abilities, but executes them faster and does not touch her eye-shards. The demon itself is part of the background and cannot be attacked. Also, the gauge will fill regardless of the position of the player and at a faster rate than before.
The demon has only one attack: it will lock on the position and impale the player with two of his thorns that hangs on the top of the screen. The actual physical hit doesn't do damage, but upon hitting the ground, a dark zone will appear beneath it that inflicts small damage over time and slows the player inside it.
During this battle Kaze'aze has 2,000 HP bars, making her nearly impossible to defeat. Fortunately, it is not necessary to kill her to win the battle; the players must survive her and her demon's onslaught for about 4 minutes and dialogue will appear, which makes the two stop attacking and disappear afterwards, leading to the completion of the dungeon, which will result in a failure anyways due to the storyline.
If the players somehow manage to defeat Kaze'aze, the ending dialogue will appear instantly, without needing to wait 4 minutes.
Trivia

Thief's Shadows of the Past Lv 1

Thief's Shadows of the Past Lv 2
- Kaze'aze is entitled the Queen of Darkness, and her second form is called Jin Kaze'aze.
- "Jin" means "True" in Korean hanja, most likely referring to her true form.
- "Kaze"(風) means "Wind" in Japanese.
- Kaze'aze has armor modeled after her.
- According to the storyline, Kaze'aze had to go through much work to create the Serdin/Kanavan War and had fled to prevent being executed. Ironically, the game shows that Kaze'aze possesses extreme power; therefore, tricking the Queen of Kanavan into darkness nor fleeing from execution was not needed.
- There are three victims of possession by Kaze'aze: the Kanavan queen, Ronan, and Lass.
- According to the dialogue of Kastulle Ruins Lower Floor, the Chase conclude of a "greater evil" present as this evil had granted Victor greater strength and had possessed King Guang. However, this conclusion is ironic as Kaze'aze is known to do such things, for she had transformed Elena into Kamiki and had possessed three people. Additionally, Knight Master mentions that she powered up the Harpy Queen and the Orc Lord.
- In The Whispering Woods, Elesis mentions that Kaze'aze is stationed on Ellia, but they had never found any evidence of her whereabouts.
- Dimensional rips created by Kaze'aze are most likely a form of Dimensional Portals.
- In Season 1, Kaze'aze Lass wore some type of armor that represented Kaze'aze herself, only it had lighter textures. In Season 2, he wore the Kaze'aze's Armor (excluding helmet). In Season 3, the armor was re-textured and more modernized; the face of Kaze'aze was on his chest, there were some modifications to the armor, and he wore a cloak. Also in the same season, he had a darkish aura that resembled the Gladiator's Mocking Blade.
- Interestingly enough, the Kaze'aze Lass in Season 3 does not have the cloak in the battle and the aura is not present in the artwork.
- During Season 1 of Grand Chase, Lass did not originally appear in Kaze'aze's Castle; instead a slightly humanoid, smaller form of Kaze'aze appeared, wielding an orb similar to Abyss Knight's and capable of firing a large beam from it (called "Double Buster"). After defeating this form, the orb within her hand grows several times larger until it sparks a reaction, transforming into her to her complete form, Jin Kaze'aze.
- Back in Season 1, Kaze'aze had an animation to transform, but it was removed prior to Season 2. It is unknown why the animation was taken out.
- Prior to Season 3, after defeating Kaze'aze Lass in the primary background of her Castle, the players are warped to an area with darkish-like background and invisible platforms.
- Back in Season 1, Kaze'aze had an animation to transform, but it was removed prior to Season 2. It is unknown why the animation was taken out.
- Kaze'aze seemingly mocked a "peace" disturbed because of the Chase's violence, but that was actually a fact. They slaughtered countless Goblins, Orcs, Harpies, Dragons, Trolls, Golems, Machines, Anmons, and other beings just to find Kaze'aze.
- However, Kaze'aze technically did create the manslaughter as well as influencing many monsters to attack.
- Contrary to popular belief, Kaze'aze was not the demon who attacked and nearly killed Sieghart.
- There is a pet modeled after Kaze'aze, named Kaze'doggeh.
- Strangely, Kaze'doggeh spits fire, an attack in which the actual Kaze'aze is no longer capable of performing.
- Thief Skill Tree has a skill, Shadows of the Past, that makes Lass groan in pain while summoning Kaze'aze, albeit smaller for obvious reasons. She attacks in two ways:
- Level 1 - Kaze'aze pounds the ground furiously.
- Level 2 - Kaze'aze shoots a fireball in front of Lass, creating a large explosion.
- Strangely, this is an attack in which the actual Kaze'aze can no longer perform.
Gallery
")
")
")
")
")
")
")
")
")