Grand Chase Wiki
Advertisement
Desert Bandits
  • StarStar2Star2: Level 78-80
  • StarStarStar2: Level 79-81
  • StarStarStar: Level 80-82

Champ: Level 81-83

Desert Bandit's Village BG

Deserted Town Background

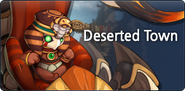
The Deserted Town (also known as Desert Raiders’ Hideout, Desert Bandit's Village or Village of the Desert Rogues) is the fifth dungeon of Alcubra.

This dungeon provides Bunkers with aimable crossbows across its rooms to help players combat the monsters. The Z attack of the bunker rapidly fires arrows, while the X attack has the player fire a flaming arrow that inflicts high damage when it explodes, though it is handicapped by a cooldown time. It is necessary to use the bunkers in order to defeat the boss.

Reaching a village in the desert, the Grand Chase discover it to be a village of desert bandits. Amongst the stolen goods is the Kungji's staff, and the Chase believe the culprit to be the bandits here.
Fighting their way through the village, the Chase end up confronting the bandit's leader Khufu. After defeating him and forcing him to submit, Khufu reveals that the Kungji's treasure was stolen by the a hooded character, who is likely to be one of the hooded keepers of Ra Canyon. Despite Khufu's spiteful warnings, the Chase proceed onwards in their journey to fulfill their promise to the Kungji, which is to retrieve their stolen treasure.

Normal (Level 78-80)[]

1 2 3 4 5 6 7 8 9 10 11
A [[Image:m_ {{{A1}}}.PNG]] [[Image:m_ {{{A2}}}.PNG]] M boss [[Image:m_ {{{A4}}}.PNG]] [[Image:m_ {{{A5}}}.PNG]] [[Image:m_ {{{A6}}}.PNG]] [[Image:m_ {{{A7}}}.PNG]] [[Image:m_ {{{A8}}}.PNG]] [[Image:m_ {{{A9}}}.PNG]] [[Image:m_ {{{A10}}}.PNG]] [[Image:m_ {{{A11}}}.PNG]]
B [[Image:m_ {{{B1}}}.PNG]] [[Image:m_ {{{B2}}}.PNG]] M uarrow [[Image:m_ {{{B4}}}.PNG]] [[Image:m_ {{{B5}}}.PNG]] [[Image:m_ {{{B6}}}.PNG]] [[Image:m_ {{{B7}}}.PNG]] [[Image:m_ {{{B8}}}.PNG]] [[Image:m_ {{{B9}}}.PNG]] [[Image:m_ {{{B10}}}.PNG]] [[Image:m_ {{{B11}}}.PNG]]
C [[Image:m_ {{{C1}}}.PNG]] [[Image:m_ {{{C2}}}.PNG]] M room M larrow M room [[Image:m_ {{{C6}}}.PNG]] [[Image:m_ {{{C7}}}.PNG]] [[Image:m_ {{{C8}}}.PNG]] [[Image:m_ {{{C9}}}.PNG]] [[Image:m_ {{{C10}}}.PNG]] [[Image:m_ {{{C11}}}.PNG]]
D [[Image:m_ {{{D1}}}.PNG]] [[Image:m_ {{{D2}}}.PNG]] [[Image:m_ {{{D3}}}.PNG]] [[Image:m_ {{{D4}}}.PNG]] M uarrow [[Image:m_ {{{D6}}}.PNG]] [[Image:m_ {{{D7}}}.PNG]] [[Image:m_ {{{D8}}}.PNG]] [[Image:m_ {{{D9}}}.PNG]] [[Image:m_ {{{D10}}}.PNG]] [[Image:m_ {{{D11}}}.PNG]]
E M start M rarrow M room M rarrow M room [[Image:m_ {{{E6}}}.PNG]] [[Image:m_ {{{E7}}}.PNG]] [[Image:m_ {{{E8}}}.PNG]] [[Image:m_ {{{E9}}}.PNG]] [[Image:m_ {{{E10}}}.PNG]] [[Image:m_ {{{E11}}}.PNG]]
F [[Image:m_ {{{F1}}}.PNG]] [[Image:m_ {{{F2}}}.PNG]] [[Image:m_ {{{F3}}}.PNG]] [[Image:m_ {{{F4}}}.PNG]] [[Image:m_ {{{F5}}}.PNG]] [[Image:m_ {{{F6}}}.PNG]] [[Image:m_ {{{F7}}}.PNG]] [[Image:m_ {{{F8}}}.PNG]] [[Image:m_ {{{F9}}}.PNG]] [[Image:m_ {{{F10}}}.PNG]] [[Image:m_ {{{F11}}}.PNG]]
G [[Image:m_ {{{G1}}}.PNG]] [[Image:m_ {{{G2}}}.PNG]] [[Image:m_ {{{G3}}}.PNG]] [[Image:m_ {{{G4}}}.PNG]] [[Image:m_ {{{G5}}}.PNG]] [[Image:m_ {{{G6}}}.PNG]] [[Image:m_ {{{G7}}}.PNG]] [[Image:m_ {{{G8}}}.PNG]] [[Image:m_ {{{G9}}}.PNG]] [[Image:m_ {{{G10}}}.PNG]] [[Image:m_ {{{G11}}}.PNG]]
H [[Image:m_ {{{H1}}}.PNG]] [[Image:m_ {{{H2}}}.PNG]] [[Image:m_ {{{H3}}}.PNG]] [[Image:m_ {{{H4}}}.PNG]] [[Image:m_ {{{H5}}}.PNG]] [[Image:m_ {{{H6}}}.PNG]] [[Image:m_ {{{H7}}}.PNG]] [[Image:m_ {{{H8}}}.PNG]] [[Image:m_ {{{H9}}}.PNG]] [[Image:m_ {{{H10}}}.PNG]] [[Image:m_ {{{H11}}}.PNG]]
I [[Image:m_ {{{I1}}}.PNG]] [[Image:m_ {{{I2}}}.PNG]] [[Image:m_ {{{I3}}}.PNG]] [[Image:m_ {{{I4}}}.PNG]] [[Image:m_ {{{I5}}}.PNG]] [[Image:m_ {{{I6}}}.PNG]] [[Image:m_ {{{I7}}}.PNG]] [[Image:m_ {{{I8}}}.PNG]] [[Image:m_ {{{I9}}}.PNG]] [[Image:m_ {{{I10}}}.PNG]] [[Image:m_ {{{I11}}}.PNG]]
I [[Image:m_ {{{J1}}}.PNG]] [[Image:m_ {{{J2}}}.PNG]] [[Image:m_ {{{J3}}}.PNG]] [[Image:m_ {{{J4}}}.PNG]] [[Image:m_ {{{J5}}}.PNG]] [[Image:m_ {{{J6}}}.PNG]] [[Image:m_ {{{J7}}}.PNG]] [[Image:m_ {{{J8}}}.PNG]] [[Image:m_ {{{J9}}}.PNG]] [[Image:m_ {{{J10}}}.PNG]] [[Image:m_ {{{J11}}}.PNG]]
I [[Image:m_ {{{K1}}}.PNG]] [[Image:m_ {{{K2}}}.PNG]] [[Image:m_ {{{K3}}}.PNG]] [[Image:m_ {{{K4}}}.PNG]] [[Image:m_ {{{K5}}}.PNG]] [[Image:m_ {{{K6}}}.PNG]] [[Image:m_ {{{K7}}}.PNG]] [[Image:m_ {{{K8}}}.PNG]] [[Image:m_ {{{K9}}}.PNG]] [[Image:m_ {{{K10}}}.PNG]] [[Image:m_ {{{K11}}}.PNG]]

Hard (Level 79-81)[]

1 2 3 4 5 6 7 8 9 10 11
A [[Image:m_ {{{A1}}}.PNG]] [[Image:m_ {{{A2}}}.PNG]] M boss [[Image:m_ {{{A4}}}.PNG]] [[Image:m_ {{{A5}}}.PNG]] [[Image:m_ {{{A6}}}.PNG]] [[Image:m_ {{{A7}}}.PNG]] [[Image:m_ {{{A8}}}.PNG]] [[Image:m_ {{{A9}}}.PNG]] [[Image:m_ {{{A10}}}.PNG]] [[Image:m_ {{{A11}}}.PNG]]
B [[Image:m_ {{{B1}}}.PNG]] [[Image:m_ {{{B2}}}.PNG]] M uarrow [[Image:m_ {{{B4}}}.PNG]] [[Image:m_ {{{B5}}}.PNG]] [[Image:m_ {{{B6}}}.PNG]] [[Image:m_ {{{B7}}}.PNG]] [[Image:m_ {{{B8}}}.PNG]] [[Image:m_ {{{B9}}}.PNG]] [[Image:m_ {{{B10}}}.PNG]] [[Image:m_ {{{B11}}}.PNG]]
C [[Image:m_ {{{C1}}}.PNG]] [[Image:m_ {{{C2}}}.PNG]] M room M larrow M room [[Image:m_ {{{C6}}}.PNG]] [[Image:m_ {{{C7}}}.PNG]] [[Image:m_ {{{C8}}}.PNG]] [[Image:m_ {{{C9}}}.PNG]] [[Image:m_ {{{C10}}}.PNG]] [[Image:m_ {{{C11}}}.PNG]]
D [[Image:m_ {{{D1}}}.PNG]] [[Image:m_ {{{D2}}}.PNG]] [[Image:m_ {{{D3}}}.PNG]] [[Image:m_ {{{D4}}}.PNG]] M uarrow [[Image:m_ {{{D6}}}.PNG]] [[Image:m_ {{{D7}}}.PNG]] [[Image:m_ {{{D8}}}.PNG]] [[Image:m_ {{{D9}}}.PNG]] [[Image:m_ {{{D10}}}.PNG]] [[Image:m_ {{{D11}}}.PNG]]
E M start M rarrow M room M rarrow M room [[Image:m_ {{{E6}}}.PNG]] [[Image:m_ {{{E7}}}.PNG]] [[Image:m_ {{{E8}}}.PNG]] [[Image:m_ {{{E9}}}.PNG]] [[Image:m_ {{{E10}}}.PNG]] [[Image:m_ {{{E11}}}.PNG]]
F [[Image:m_ {{{F1}}}.PNG]] [[Image:m_ {{{F2}}}.PNG]] [[Image:m_ {{{F3}}}.PNG]] [[Image:m_ {{{F4}}}.PNG]] [[Image:m_ {{{F5}}}.PNG]] [[Image:m_ {{{F6}}}.PNG]] [[Image:m_ {{{F7}}}.PNG]] [[Image:m_ {{{F8}}}.PNG]] [[Image:m_ {{{F9}}}.PNG]] [[Image:m_ {{{F10}}}.PNG]] [[Image:m_ {{{F11}}}.PNG]]
G [[Image:m_ {{{G1}}}.PNG]] [[Image:m_ {{{G2}}}.PNG]] [[Image:m_ {{{G3}}}.PNG]] [[Image:m_ {{{G4}}}.PNG]] [[Image:m_ {{{G5}}}.PNG]] [[Image:m_ {{{G6}}}.PNG]] [[Image:m_ {{{G7}}}.PNG]] [[Image:m_ {{{G8}}}.PNG]] [[Image:m_ {{{G9}}}.PNG]] [[Image:m_ {{{G10}}}.PNG]] [[Image:m_ {{{G11}}}.PNG]]
H [[Image:m_ {{{H1}}}.PNG]] [[Image:m_ {{{H2}}}.PNG]] [[Image:m_ {{{H3}}}.PNG]] [[Image:m_ {{{H4}}}.PNG]] [[Image:m_ {{{H5}}}.PNG]] [[Image:m_ {{{H6}}}.PNG]] [[Image:m_ {{{H7}}}.PNG]] [[Image:m_ {{{H8}}}.PNG]] [[Image:m_ {{{H9}}}.PNG]] [[Image:m_ {{{H10}}}.PNG]] [[Image:m_ {{{H11}}}.PNG]]
I [[Image:m_ {{{I1}}}.PNG]] [[Image:m_ {{{I2}}}.PNG]] [[Image:m_ {{{I3}}}.PNG]] [[Image:m_ {{{I4}}}.PNG]] [[Image:m_ {{{I5}}}.PNG]] [[Image:m_ {{{I6}}}.PNG]] [[Image:m_ {{{I7}}}.PNG]] [[Image:m_ {{{I8}}}.PNG]] [[Image:m_ {{{I9}}}.PNG]] [[Image:m_ {{{I10}}}.PNG]] [[Image:m_ {{{I11}}}.PNG]]
I [[Image:m_ {{{J1}}}.PNG]] [[Image:m_ {{{J2}}}.PNG]] [[Image:m_ {{{J3}}}.PNG]] [[Image:m_ {{{J4}}}.PNG]] [[Image:m_ {{{J5}}}.PNG]] [[Image:m_ {{{J6}}}.PNG]] [[Image:m_ {{{J7}}}.PNG]] [[Image:m_ {{{J8}}}.PNG]] [[Image:m_ {{{J9}}}.PNG]] [[Image:m_ {{{J10}}}.PNG]] [[Image:m_ {{{J11}}}.PNG]]
I [[Image:m_ {{{K1}}}.PNG]] [[Image:m_ {{{K2}}}.PNG]] [[Image:m_ {{{K3}}}.PNG]] [[Image:m_ {{{K4}}}.PNG]] [[Image:m_ {{{K5}}}.PNG]] [[Image:m_ {{{K6}}}.PNG]] [[Image:m_ {{{K7}}}.PNG]] [[Image:m_ {{{K8}}}.PNG]] [[Image:m_ {{{K9}}}.PNG]] [[Image:m_ {{{K10}}}.PNG]] [[Image:m_ {{{K11}}}.PNG]]

Very Hard (Level 80-82)[]

1 2 3 4 5 6 7 8 9 10 11
A [[Image:m_ {{{A1}}}.PNG]] [[Image:m_ {{{A2}}}.PNG]] M boss [[Image:m_ {{{A4}}}.PNG]] [[Image:m_ {{{A5}}}.PNG]] [[Image:m_ {{{A6}}}.PNG]] [[Image:m_ {{{A7}}}.PNG]] [[Image:m_ {{{A8}}}.PNG]] [[Image:m_ {{{A9}}}.PNG]] [[Image:m_ {{{A10}}}.PNG]] [[Image:m_ {{{A11}}}.PNG]]
B [[Image:m_ {{{B1}}}.PNG]] [[Image:m_ {{{B2}}}.PNG]] M uarrow [[Image:m_ {{{B4}}}.PNG]] [[Image:m_ {{{B5}}}.PNG]] [[Image:m_ {{{B6}}}.PNG]] [[Image:m_ {{{B7}}}.PNG]] [[Image:m_ {{{B8}}}.PNG]] [[Image:m_ {{{B9}}}.PNG]] [[Image:m_ {{{B10}}}.PNG]] [[Image:m_ {{{B11}}}.PNG]]
C [[Image:m_ {{{C1}}}.PNG]] [[Image:m_ {{{C2}}}.PNG]] M room M larrow M room [[Image:m_ {{{C6}}}.PNG]] [[Image:m_ {{{C7}}}.PNG]] [[Image:m_ {{{C8}}}.PNG]] [[Image:m_ {{{C9}}}.PNG]] [[Image:m_ {{{C10}}}.PNG]] [[Image:m_ {{{C11}}}.PNG]]
D [[Image:m_ {{{D1}}}.PNG]] [[Image:m_ {{{D2}}}.PNG]] [[Image:m_ {{{D3}}}.PNG]] [[Image:m_ {{{D4}}}.PNG]] M uarrow [[Image:m_ {{{D6}}}.PNG]] [[Image:m_ {{{D7}}}.PNG]] [[Image:m_ {{{D8}}}.PNG]] [[Image:m_ {{{D9}}}.PNG]] [[Image:m_ {{{D10}}}.PNG]] [[Image:m_ {{{D11}}}.PNG]]
E M start M rarrow M room M rarrow M room [[Image:m_ {{{E6}}}.PNG]] [[Image:m_ {{{E7}}}.PNG]] [[Image:m_ {{{E8}}}.PNG]] [[Image:m_ {{{E9}}}.PNG]] [[Image:m_ {{{E10}}}.PNG]] [[Image:m_ {{{E11}}}.PNG]]
F [[Image:m_ {{{F1}}}.PNG]] [[Image:m_ {{{F2}}}.PNG]] [[Image:m_ {{{F3}}}.PNG]] [[Image:m_ {{{F4}}}.PNG]] [[Image:m_ {{{F5}}}.PNG]] [[Image:m_ {{{F6}}}.PNG]] [[Image:m_ {{{F7}}}.PNG]] [[Image:m_ {{{F8}}}.PNG]] [[Image:m_ {{{F9}}}.PNG]] [[Image:m_ {{{F10}}}.PNG]] [[Image:m_ {{{F11}}}.PNG]]
G [[Image:m_ {{{G1}}}.PNG]] [[Image:m_ {{{G2}}}.PNG]] [[Image:m_ {{{G3}}}.PNG]] [[Image:m_ {{{G4}}}.PNG]] [[Image:m_ {{{G5}}}.PNG]] [[Image:m_ {{{G6}}}.PNG]] [[Image:m_ {{{G7}}}.PNG]] [[Image:m_ {{{G8}}}.PNG]] [[Image:m_ {{{G9}}}.PNG]] [[Image:m_ {{{G10}}}.PNG]] [[Image:m_ {{{G11}}}.PNG]]
H [[Image:m_ {{{H1}}}.PNG]] [[Image:m_ {{{H2}}}.PNG]] [[Image:m_ {{{H3}}}.PNG]] [[Image:m_ {{{H4}}}.PNG]] [[Image:m_ {{{H5}}}.PNG]] [[Image:m_ {{{H6}}}.PNG]] [[Image:m_ {{{H7}}}.PNG]] [[Image:m_ {{{H8}}}.PNG]] [[Image:m_ {{{H9}}}.PNG]] [[Image:m_ {{{H10}}}.PNG]] [[Image:m_ {{{H11}}}.PNG]]
I [[Image:m_ {{{I1}}}.PNG]] [[Image:m_ {{{I2}}}.PNG]] [[Image:m_ {{{I3}}}.PNG]] [[Image:m_ {{{I4}}}.PNG]] [[Image:m_ {{{I5}}}.PNG]] [[Image:m_ {{{I6}}}.PNG]] [[Image:m_ {{{I7}}}.PNG]] [[Image:m_ {{{I8}}}.PNG]] [[Image:m_ {{{I9}}}.PNG]] [[Image:m_ {{{I10}}}.PNG]] [[Image:m_ {{{I11}}}.PNG]]
I [[Image:m_ {{{J1}}}.PNG]] [[Image:m_ {{{J2}}}.PNG]] [[Image:m_ {{{J3}}}.PNG]] [[Image:m_ {{{J4}}}.PNG]] [[Image:m_ {{{J5}}}.PNG]] [[Image:m_ {{{J6}}}.PNG]] [[Image:m_ {{{J7}}}.PNG]] [[Image:m_ {{{J8}}}.PNG]] [[Image:m_ {{{J9}}}.PNG]] [[Image:m_ {{{J10}}}.PNG]] [[Image:m_ {{{J11}}}.PNG]]
I [[Image:m_ {{{K1}}}.PNG]] [[Image:m_ {{{K2}}}.PNG]] [[Image:m_ {{{K3}}}.PNG]] [[Image:m_ {{{K4}}}.PNG]] [[Image:m_ {{{K5}}}.PNG]] [[Image:m_ {{{K6}}}.PNG]] [[Image:m_ {{{K7}}}.PNG]] [[Image:m_ {{{K8}}}.PNG]] [[Image:m_ {{{K9}}}.PNG]] [[Image:m_ {{{K10}}}.PNG]] [[Image:m_ {{{K11}}}.PNG]]

Champion (Level 81-83)[]

1 2 3 4 5 6 7 8 9 10 11
A [[Image:m_ {{{A1}}}.PNG]] [[Image:m_ {{{A2}}}.PNG]] M boss [[Image:m_ {{{A4}}}.PNG]] [[Image:m_ {{{A5}}}.PNG]] [[Image:m_ {{{A6}}}.PNG]] [[Image:m_ {{{A7}}}.PNG]] [[Image:m_ {{{A8}}}.PNG]] [[Image:m_ {{{A9}}}.PNG]] [[Image:m_ {{{A10}}}.PNG]] [[Image:m_ {{{A11}}}.PNG]]
B [[Image:m_ {{{B1}}}.PNG]] [[Image:m_ {{{B2}}}.PNG]] M uarrow [[Image:m_ {{{B4}}}.PNG]] [[Image:m_ {{{B5}}}.PNG]] [[Image:m_ {{{B6}}}.PNG]] [[Image:m_ {{{B7}}}.PNG]] [[Image:m_ {{{B8}}}.PNG]] [[Image:m_ {{{B9}}}.PNG]] [[Image:m_ {{{B10}}}.PNG]] [[Image:m_ {{{B11}}}.PNG]]
C [[Image:m_ {{{C1}}}.PNG]] [[Image:m_ {{{C2}}}.PNG]] M room M larrow M room [[Image:m_ {{{C6}}}.PNG]] [[Image:m_ {{{C7}}}.PNG]] [[Image:m_ {{{C8}}}.PNG]] [[Image:m_ {{{C9}}}.PNG]] [[Image:m_ {{{C10}}}.PNG]] [[Image:m_ {{{C11}}}.PNG]]
D [[Image:m_ {{{D1}}}.PNG]] [[Image:m_ {{{D2}}}.PNG]] [[Image:m_ {{{D3}}}.PNG]] [[Image:m_ {{{D4}}}.PNG]] M uarrow [[Image:m_ {{{D6}}}.PNG]] [[Image:m_ {{{D7}}}.PNG]] [[Image:m_ {{{D8}}}.PNG]] [[Image:m_ {{{D9}}}.PNG]] [[Image:m_ {{{D10}}}.PNG]] [[Image:m_ {{{D11}}}.PNG]]
E M start M rarrow M room M rarrow M room [[Image:m_ {{{E6}}}.PNG]] [[Image:m_ {{{E7}}}.PNG]] [[Image:m_ {{{E8}}}.PNG]] [[Image:m_ {{{E9}}}.PNG]] [[Image:m_ {{{E10}}}.PNG]] [[Image:m_ {{{E11}}}.PNG]]
F [[Image:m_ {{{F1}}}.PNG]] [[Image:m_ {{{F2}}}.PNG]] [[Image:m_ {{{F3}}}.PNG]] [[Image:m_ {{{F4}}}.PNG]] [[Image:m_ {{{F5}}}.PNG]] [[Image:m_ {{{F6}}}.PNG]] [[Image:m_ {{{F7}}}.PNG]] [[Image:m_ {{{F8}}}.PNG]] [[Image:m_ {{{F9}}}.PNG]] [[Image:m_ {{{F10}}}.PNG]] [[Image:m_ {{{F11}}}.PNG]]
G [[Image:m_ {{{G1}}}.PNG]] [[Image:m_ {{{G2}}}.PNG]] [[Image:m_ {{{G3}}}.PNG]] [[Image:m_ {{{G4}}}.PNG]] [[Image:m_ {{{G5}}}.PNG]] [[Image:m_ {{{G6}}}.PNG]] [[Image:m_ {{{G7}}}.PNG]] [[Image:m_ {{{G8}}}.PNG]] [[Image:m_ {{{G9}}}.PNG]] [[Image:m_ {{{G10}}}.PNG]] [[Image:m_ {{{G11}}}.PNG]]
H [[Image:m_ {{{H1}}}.PNG]] [[Image:m_ {{{H2}}}.PNG]] [[Image:m_ {{{H3}}}.PNG]] [[Image:m_ {{{H4}}}.PNG]] [[Image:m_ {{{H5}}}.PNG]] [[Image:m_ {{{H6}}}.PNG]] [[Image:m_ {{{H7}}}.PNG]] [[Image:m_ {{{H8}}}.PNG]] [[Image:m_ {{{H9}}}.PNG]] [[Image:m_ {{{H10}}}.PNG]] [[Image:m_ {{{H11}}}.PNG]]
I [[Image:m_ {{{I1}}}.PNG]] [[Image:m_ {{{I2}}}.PNG]] [[Image:m_ {{{I3}}}.PNG]] [[Image:m_ {{{I4}}}.PNG]] [[Image:m_ {{{I5}}}.PNG]] [[Image:m_ {{{I6}}}.PNG]] [[Image:m_ {{{I7}}}.PNG]] [[Image:m_ {{{I8}}}.PNG]] [[Image:m_ {{{I9}}}.PNG]] [[Image:m_ {{{I10}}}.PNG]] [[Image:m_ {{{I11}}}.PNG]]
I [[Image:m_ {{{J1}}}.PNG]] [[Image:m_ {{{J2}}}.PNG]] [[Image:m_ {{{J3}}}.PNG]] [[Image:m_ {{{J4}}}.PNG]] [[Image:m_ {{{J5}}}.PNG]] [[Image:m_ {{{J6}}}.PNG]] [[Image:m_ {{{J7}}}.PNG]] [[Image:m_ {{{J8}}}.PNG]] [[Image:m_ {{{J9}}}.PNG]] [[Image:m_ {{{J10}}}.PNG]] [[Image:m_ {{{J11}}}.PNG]]
I [[Image:m_ {{{K1}}}.PNG]] [[Image:m_ {{{K2}}}.PNG]] [[Image:m_ {{{K3}}}.PNG]] [[Image:m_ {{{K4}}}.PNG]] [[Image:m_ {{{K5}}}.PNG]] [[Image:m_ {{{K6}}}.PNG]] [[Image:m_ {{{K7}}}.PNG]] [[Image:m_ {{{K8}}}.PNG]] [[Image:m_ {{{K9}}}.PNG]] [[Image:m_ {{{K10}}}.PNG]] [[Image:m_ {{{K11}}}.PNG]]

Monsters[]

Dialogue[]

Beginning[]

RonanjRonan: We've finally found a village. Let's take a break for now.
ArmejArme: Bwahh.. I can't walk anymore~
ElesisjElesis: (Everyone's exhausted.) Let's find a place to stay and get some supplies.
Mine Bandit: Oh! You guys aren't from around here! It looks like you all had a long journey here~ Are you looking for a place to stay for the night?
RonanjRonan: Yes. Do you know any places?
Mine Bandit: Of course I do! I know a great place! So, should I lead the way?
RonanjRonan: Thank you.
LirejLire: By the way.. where are all the villagers? Hm? That symbol in that artifact!
ArmejArme: Huh! Why is that here?
ElesisjElesis: Hey, wait a second! How come there's an artifact from Kungji Village here?
Mine Bandit: So you know what that is? Huhuhuhu.. How troublesome! Hey everyone! We've been found! We tried to settle this quietly, but I guess that won't work! You are the ones who came to pry, so don't blame us! Kekeke!
RonanjRonan: This doesn't look good.
ElesisjElesis: So this was these bandits' hideout.. Then we might be able to find the treasure from Kungji Village!!

Weapons[]

ElesisjElesis: What's this? I've never seen this before.
LirejLire: It looks like a crossbow, but it has an additional device. We might be able to use it!
RonanjRonan: Everyone! The enemy is nearing! Watch out!
ElesisjElesis: Ugh! They're so persistent!

Boss[]

ArmejArme: Look! There's a baby on that giant scorpion!!.. Don't worry little boy! I will..
(The scorpion produces an earthquake, knocking the Chase upward)
ArmejArme: Kyahhhh!
Khufu: What are you saying, you camel? I'm the great Khufu of the desert!
ArmejArme: C.. Camel?!
ElesisjElesis: He called himself "the great".. Doesn't he have no shame? I don't care who you are! You are the ones who stole Kungji Village's treasure, huh!!
Khufu: Maybe~? We have stolen too many things in this vast desert~ Do we have to remember what we stole from where? All that matters is the price! Don't you think? You camels! Puhahaha~
ElesisjElesis: (Snap!) Well then, I'll make you remember now!! This camel..!!

Post Boss Battle[]

ElesisjElesis: Well? Do you remember now? Oh great Khufu of the desert~?
Khufu: Hmph! You think I'm gonna tell you? The great..
ElesisjElesis: Punch!!!
Khufu: Ugh! This is nothing..
ElesisjElesis: Punch!!!
Khufu: .. I don't know. I don't know where that treasure i..
ElesisjElesis: Punch!!!
Khufu: "He" took it!!!
ElesisjElesis: Who is "he"?
Khufu: Yes, yeah! "him"! We did take the treasure from Kungji Village. But we were robbed too..
ElesisjElesis: Elaborate.
Khufu: One night, this "guy" wearing a hood came and said "This is not something you should have.." and then he took the treasure and disappeared into the darkness just like that!
LirejLire: I don't think he's lying.
RonanjRonan: Someone wearing a hood.. It will be hard to find him with just that information.
Khufu: Kuhaha.. You shouldn't go after them. You think we couldn't catch him? No.. It wasn't that we couldn't.. We didn't. "They" are the only ones who wear hoods around here.
ElesisjElesis: "They"? Hurry up and tell us!!
Khufu: I'll tell you since you will all die anyways once you find them!
Khufu: Here in Alcubra, there's a tomb of a well known god. It is said that the place is full of precious treasures. But no one knows if it's true or not. Because.. Those who went all lost their lives before even seeing Seth's Pyramid~ Kuhahaha
LirejLire: What.. What happened?
Khufu: .. The only way to Seth's Pyramid is through the Ra Canyon. That's where "they" are. The guardians of Ra Canyon.. No one knows their true identity. Only the fact that they have hoods.. Rumours say that they protect Seth's Pyramid from plunderers or that they're simply cold-blooded murderers.. One thing that is for sure is that no one who has passed through the canyon has been able to come back. Like my minions..
LirejLire: .. What should we do?
ElesisjElesis: What do you mean, "What should we do"?! Of course we're going! We promised the Kungji!!!
Khufu: Puhahaha! How fitting of the camels! Do as you wish! I could care less about your lives!
(Khufu exits)
RonanjRonan: I knew you would say that, Miss Elesis.
ElesisjElesis: Brace yourselves everyone! We have a long journey ahead!!!

Trivia[]

  • Up to this dungeon, there is so far one person encountered by the Grand Chase in Alcubra who was seen with the hood.
Dungeons of Grand Chase
Serdin
Trial Forest | Trial Tower | Outer Wall of Serdin | Kerrie Beach | Orc Temple | Gorgos' Dungeon
Kanavan
Elven Forest | Gorge of Oath | Marsh of Oblivion | Forsaken Barrows | Forgotten City | Gaikoz's Castle
Silver Land
The Whispering Woods | Ruins of the Silver Knights | Lake Aurora | King Guang's Fen | Primeval Island | King Fang's Lair | Victor's Fortress
Ellia
Partusay's Sea | Kamiki Castle | Temple of Fire | Hell Bridge | Kaze'aze's Castle | Kastulle Ruins Lower Floor | Kastulle Ruins Upper Floor | Battle for Bermesiah | Dimension's Door
Xenia
Xenia Border | Temple of Cuatal | Valstrath | The Wyrm's Maw | Altar of Judgement | Temple of Destruction | Forest of Life | Fortress of Ascension | Dimension's Door
Alcubra
Goblin Work Site | Underpass of Lost Hope | Kungji Village | Sands of Illusion | Deserted Town | Ra Canyon | Seth's Pyramid | Dimension's Door
Archimedia
Hammer's Reach | Under Hammer | Thunder Hammer | Relics of Kounat | Zeruel Border | Zeruel | Kounat's Collapse | Dimension's Door
île de Frost
Cursed Garden | Contaminated Basement | Spectral Corridor | Traitor's Art Room | Dark Library | Arachne's Nest
Trivia
Goliath Habitat | Ancient Golem Ruins | Shadow Forest | Lacerta Hunting Ground | Land of Despair | Dimension's End
Hero Dungeons
Sanctum of Destruction | The Crucible | Wizard's Labyrinth | Tower of Disappearance | Land of Judgment
Event Dungeons
Relay Dungeon | Nightmare Circus | Monster Train 301 | Hungry Pets' Revolt | Moonlight Village | Kounat Mental Collapse | Talin's Revenge | King Slime Land | Gorgos Queen's Nest | Illusions of Memory | Throne of the Goddess | Dimensional Chaser
Raid Dungeons
Berkas' Lair | Void (Invasion) | Void (Taint)
Advertisement